Semi-Veggie Jessie

Vegetarian recipes for beginner home cooks

Skillet Pizza Pasta Bake November 24, 2010

Filed under: Recipes — semiveggie @ 4:26 pm
Tags: , , , ,

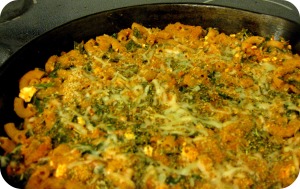
Skillet Pizza Pasta Bake


I am a thrift store addict.  I’m one of those people who cannot pass by a Goodwill store without stopping in “just for a minute”.  I love garage sales, farm stands, and those cheesy outdoor flea markets.  You know, the kind where you can buy fake designer purses, vintage china dishes, and old power tools all in the same place.  I can’t seem to stay away.  In the summertime, I wake up early to go trolling the garage sales in my town.   It’s amazing what you can find!

Before moving in to our new house two years ago, I went on a thrifting spree.  Thanks to my efforts, I was able to stock most of my kitchen with cookware that had been “pre-loved”, as they say in the used car industry.  I’ve found everything from Pampered Chef pizza stones to dutch ovens at yard sales, all for ridiculously low prices.

My favorite thrift store find is my cast-iron skillet.  A few years ago, I would have passed by this treasure without a second thought.  However, I had recently tried to follow a recipe online that ended in disaster.  I had been happily working my way through the recipe with my trusty non-stick pan, when suddenly the recipe directed me to put the entire pan in the oven to bake.  “What?” I thought.  “I can’t put my pan in the oven!  What a weird idea.  Wouldn’t it melt?”  After a quick Google search, I realized that I needed something called a cast-iron skillet to complete the recipe.  Cast-iron pans can be heated on the stovetop, and are heat-safe for the oven too.  I considered buying one, but those skillets can be expensive.  One day, during my routine Saturday morning schedule of gym – farmer’s market – thrift store, I came across a gorgeous cast-iron skillet at my neighborhood Salvation Army store.  It was mine for $12, and I’ve been using it ever since.

Cast-iron skillets can turn any dish into a casserole.  Just cook up some grains or pasta, add cheese, and pour into the skillet.  Bake at 350 until the cheese melts.  Easy!  This recipe uses pasta and mozzarella cheese.  The seasonings make it taste like pizza, so don’t skimp on the spices!  Go out and buy oregano if you don’t have any in your pantry, because a recipe for real pizza is coming up soon on SemiVeggie.  A pizza without oregano just isn’t worth it, I promise.

Skillet Pizza Pasta Bake

Ingredients:

One box of whole wheat pasta

Two tablespoons of olive oil

Two cloves of garlic, minced

One 16 oz. bag of frozen spinach

One 16 oz. can of tomato sauce

8 oz. of pre-crumbled feta cheese

1 teaspoon Italian seasoning

1 teaspoon oregano

1 teaspoon garlic salt

Large handful of shredded mozzarella cheese

¼ cup bread crumbs

Parmesan cheese to sprinkle on top

Special tools needed:

A cast-iron skillet.  If you don’t have one, this recipe also works well as a simple pasta dinner.  Just combine the spinach, seasonings, tomato sauce and cheese with the pasta and enjoy your pizza-flavored dish!

Directions:

Preheat the oven to 350 degrees.

Boil water for the pasta in a large pot.  Cook pasta until firm, but not overdone.  Remember, the pasta will continue to cook when we put the skillet into the oven.  Drain the pasta, and set aside.

Heat olive oil in a pan.  Add garlic, and cook for one minute on medium.  Add spinach, tomato sauce, feta cheese, Italian seasoning, oregano, and garlic salt.  Stir to combine.  Cook mixture for five minutes over low heat.

Combine the pasta and the spinach mixture in the large pot.  Pour the mixture into your cast-iron skillet.  Sprinkle bread crumbs, mozzarella, and parmesan cheese on top.   Bake for 10 – 15 minutes in the oven until crispy.

Enjoy!
~Semi-Veggie Jessie
 

Salted Red Wine Vinaigrette November 18, 2010

Filed under: Recipes — semiveggie @ 9:12 pm
Tags: ,

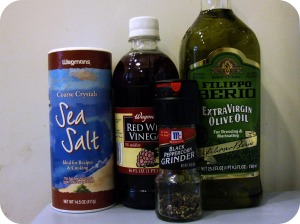
Salted Red Wine Vinaigrette


You think I can’t hear you out there.  You think that just because there’s a computer and miles between us that I can’t hear what you’re saying right now.  Well, you’re wrong.  Maybe it’s the teacher in me, but I can hear people’s thoughts from miles away.  Right now, you’re thinking:


“A recipe for salad dressing??  I came to Semi-Veggie to find out what to make for dinner, and she’s giving me a recipe for salad dressing?  I don’t even have the groceries in my house right now to make a salad, much less the time and energy and ingredients to make freakin’ salad dressing.  I’m ordering take-out right now.  Jessie’s crazy.  Anyway, I don’t want to be the type of person who makes homemade salad dressing!  Making your own salad dressing seems so… stuffy and Martha Stewart-esque.  What, Jessie, you think you’re better than me?  You think you’re above florescent orange French salad dressing?   Didn’t you just go on a few weeks ago about how it’s ok to use prepared ingredients in the kitchen?  Are you going to come to my house and judge my bottles of Creamy Ranch?”


Are you finished?


“Well, yeah.  Thanks for listening.”


No problem.  So now that we have that out of the way, you really need to make this stuff.  It takes literally two minutes to make, and it tastes amazing.   But I’m sure you’re still wondering why I make my own salad dressing, and why I think you should do the same.  Honestly, I make my own salad dressing because it’s cheaper than buying the three dollar squeezable bottles.  Also, the homemade stuff tastes much better than anything I’ve bought at the store.  Isn’t that enough?  Are you convinced yet?  No?  Well… don’t knock it until you’ve tried it.  Now, go shake up some dressing!


Salted Red Wine Vinaigrette

Ingredients:

½ cup olive oil


½ cup red wine vinegar


1 tsp. sour cream or yogurt


Lots of salt and pepper


Directions:

Pour olive oil and red wine vinegar into a bottle.  I like to use an old balsamic vinegar bottle, but anything will work.  Add the sour cream or yogurt, and sprinkle in lots of salt and pepper.  Put a cap on the bottle, and shake it up!  The oil and the vinegar will blend and make delicious dressing.  I can’t even tell you how good this stuff is – pour it over salad greens, carrots, broccoli, whatever you have in your veggie drawer.  J. and I keep a bottle of it on the dining room table, and we easily go through one bottle a week.  It’s that good.


Baked Chickpea Burgers (Falafel) November 14, 2010

Filed under: Recipes — semiveggie @ 7:41 am
Tags: , , , ,

Baked Chickpea “Burgers” (Falafel)


It’s officially winter here in upstate NY.  I know, the calendar says it’s only November, but I start mourning the loss of warmer temperatures on Halloween.  Right now my hands are freezing as I type, my neck is cold without a scarf on, and my little puppy doesn’t want to go for long walks outside anymore.  In my world, winter has begun.  Now, I’m sure some of you just love wintertime.  You can’t wait for peppermint mochas and snowball fights.  The cold wind invigorates your body and livens up your spirit.  Well, good for you!  I plan on hibernating until April, thank you very much.

Sometimes, I try to trick myself into feeling more optimistic about the impending cold weather.  “It’s not wintertime, Jessie!”  I’ll tell myself.  “It’s just a cold autumn, or a freezing springtime.  Maybe my hands aren’t freezing from the bitter wind at all!  Instead, my fingers must be tingling with excitement!  The foggy air in front of you?  It’s just the humid summer air!”

Yeah, I know – my mindtricks are pretty lame.  But I feel better if I can forget about the harsh realities of winter for a little while.  Thinking of spring for a just moment makes the cold wind outside seem less permanent.  Sometimes, that’s all I need to get me through the next freezing cold day.

After all, changing your mindset can be as easy as changing a name or two.  For example, I was going to call this recipe just “Falafel”.  Because, well – it is falafel.  But all too often, I’ve announced dinner only to be met with confused looks.  “Falafel?” people ask.  “I don’t know what that is – can I have macaroni and cheese instead?”  Or, “A falafel?  Isn’t that a type of snow plow?”  Also, the word “falafel” doesn’t explain what you’re actually eating.  It’s not like the word “pizza” or “sandwich”.  Everyone already has an idea about the ingredients in pizza or in a sandwich, but falafel hasn’t always made it into our common vocabulary yet.  You don’t want to scare people away from your kitchen, so it’s a good idea to always have some alternate recipe titles in mind.  “Baked Chickpea Patties” or “Oven-Baked Chickpea Sliders” sound delicious, and everyone knows the main ingredient.  Plus, the concept is already familiar – everyone likes burgers.
So the next time it’s freezing cold outside (oops, I mean the next time there’s a lovely bite of chill in the air), announce to your loved ones that you’re making baked chickpea burgers.  They’ll love the little sliders, and you’ll love the warmth from the oven during those cold nights.  Enjoy!

Baked Chickpea Burgers (Falafel)


Ingredients:

One 16 oz. can of chickpeas, drained

¼ cup onion, diced

1 tsp. cumin

1 tsp. salt

1 tsp. flour

Optional: 1 tsp. cilantro or parsley, minced

Toppings for burgers: pickles, ketchup, and cheddar cheese

Directions:

Preheat the oven to 350 degrees.  Line a cookie sheet with aluminum foil.

Combine all ingredients in a food processor, and pulse until the mixture holds together in a dough.

Refrigerate the dough for twenty minutes.

Scoop small patties out of the dough.  Shape into flat discs, and place onto the prepared cookie sheet.  Bake for six minutes, and then flip the burgers over.  Bake for another six minutes.  Continue to bake until the burgers are crispy on the outside, 5-10 minutes more.

Enjoy!
~Semi-Veggie Jessie


Easy Roasted Veggies November 7, 2010

Filed under: Recipes — semiveggie @ 9:48 am
Tags: ,

Easy Roasted Veggies


Isn’t that the ugliest veggie you’ve ever seen?  My friend brought it home from her produce pick-up this week, and we’ve been staring at it in disgust ever since.  I think it looks like Minnie Mouse; my friend thinks it looks like a cat.  If I had seen this veggie at Wegman’s, I would have never put it into my cart.  I would have been intimidated by its size, and I wouldn’t have wanted to deal with the chopping and peeling associated with this mammoth root vegetable.  It’s easy to spend time preparing sweet potatoes or carrots, because you know that the results will be lovely and delicious.  It’s harder to motivate yourself to peel and chop a veggie that looks like a striped bowling ball.  Plus, what if it tastes as ugly as it looks?  I hate wasting time in the kitchen, and I get really disappointed when my cooking experiments end up inedible.  But, I also hate wasting food, so I decided to tackle the ugly veggie challenge.

Even though I was fascinated by the large purple globe at first, it sat on my kitchen counter for three days before I even attempted to google its origins.  “It’s not some kind of weird potato, is it?”  I thought.  “Maybe it’s a turnip or a radish!”  I tried googling “purple root vegetable”, and I discovered that this ugly veggie is a rutabaga.  I’m sure not all rutabagas are ugly, but this one is so disturbing, it actually hurts your eyes when you look at it.  I poked it with my finger to see if it would roll over, and it wobbled around on my countertop.  I looked at the pathetic veggie, and tried to come up with ways to avoid cooking it.  “Maybe I could use it in an art installation!”  I thought.  “Or I could donate it to my school’s cafeteria!”  I thought about staging pictures with my new ugly rutabaga, kind of like a vacation slideshow: oh, here’s Rutabaga and Jessie at the Jersey Shore, just getting some sun.  That crazy Rutabaga likes to gamble – here’s a picture of us throwing dice at the blackjack table.  I stared at the rutabaga until I ran out of excuses.  Then, I pulled out my cutting board and started hacking away at the purple flesh.  I peeled and diced until the rutabaga was scattered in sad little chunks all over my kitchen counter.

I was scared to taste a piece of raw rutabaga, despite google’s claims of rutabaga deliciousness.  Instead, I used a time-tested method for making veggies palatable: add salt and fat!  Any veggie can become delicious when roasted with olive oil and sea salt, right?  I tossed the rutabaga sticks in oil and salt, turned the oven on, and did a little dance.  I didn’t waste any food, and I conquered my fear of the ugly veggie!  Stay tuned for further installments of the ugly veggie challenge!

Easy Roasted Veggies

I have to be honest: even after I doused the rutabaga in salt and fat, I didn’t like it.  I kept nibbling the slices, trying to force my taste buds to alter the flavor, but it didn’t work.  The rutabaga tasted bitter, and the salt didn’t cover up the taste enough.  If you have suggestions for helping the rutabaga become delicious, I’d love to hear them.  This recipe for easy roasted veggies is more of a method, so feel free to use any vegetable you want – even ugly ones.

Ingredients:

Veggie of your choice.  I recommend sweet potatoes, red potatoes, cauliflower, peppers, onions, mushrooms, or squash.  Mushrooms and onions will cook quicker than the root vegetables, so adjust the cooking time accordingly.

Two tablespoons of olive oil

Salt and pepper to taste

Optional additions: roasted veggies taste great with added herbs.  Try sprinkling herbs de Provence, rosemary, or thyme over your veggies before roasting.

Directions:

Pre-heat the oven to 400 degrees.

Slice veggies into pieces.  Sticks, cubes, slices – you can roast veggies in any shape.  Use a sharp chef’s knife, and watch your fingers while slicing!

Line a cookie sheet with foil.

Toss veggies with olive oil, salt, and pepper.

Spread the veggies on the cookie sheet.

Put the veggies in the oven for 20 minutes.   Flip the veggies over, and bake for another 15-20 minutes.  The veggies should be soft but not mushy.

We eat roasted veggies with everything.  Try throwing them into pasta, adding to quinoa or grain salads, or rolling up in a tortilla with feta cheese.  Delicious!

Enjoy!
~Semi-Veggie Jessie


Homemade “Clif” Energy Bars November 3, 2010

Filed under: Recipes — semiveggie @ 2:05 pm
Tags: , , , , , ,

What Would You Cook If You Couldn’t Leave the House?


Oh no!  I can see it now.  You walked out of your house to your car, hoping to drive to town and get some dinner.  You put your keys in the ignition, but the car won’t start!  Without transportation, your plans to purchase a Big Mac and fries are ruined.  You drag yourself back inside the house, and stare at your pantry in agony.   It’s time to be innovative: how would you satisfy your hunger if you couldn’t leave the house?

Choose ingredients based on the time of day.

If you want some some breakfast inspiration, eggs are a good start.  Crack a few eggs into a bowl, and add some veggies.  Lunches usually involve sandwiches – toast some bread and check your fridge for possible fillings.  Dinners can start with a grain or starch, such as pasta.  Boil some water, and then search your kitchen for ingredients that like to be boiled: potatoes, barley, or macaroni for example.  Desserts generally begin with sugar and butter, so start your mixer and go from there.  Use these stereotypical meal categories to jump-start your culinary creations.

Search the back of your pantry.

The back of my pantry is a Bermuda Triangle of ingredients.  Half-empty boxes of brown rice.  Chocolate-dusted boxes of cocoa powder.  Sherry vinegar, cornstarch, oats, and rye flour.  Separately, the contents of my pantry don’t sound very exciting to my taste buds.  Rather than just staring at the same ingredients you always see in the pantry, go digging!  Grab that tall bottle you see leaning over in the back corner.  Ooh, it’s rice vinegar… maybe it’s time for a stir-fry.  Turn the labels on your cans to face the front for easier reading.  I forgot I had evaporated milk in the house!  Brownies, anyone?  Take out any ingredients that sound delicious, and put them on the counter.  Now, match them up.  Pair the balsamic vinegar with pasta, and add a can of tomatoes.  Place the lentils next to the veggie broth and a can of corn.  Experiment with different combinations.

Inspect your veggies and dairy.

Pull out the vegetable drawer in your fridge.  Take out anything spoiled, and throw it away.  Go through the remaining veggies, and ask yourself, “Will this spoil overnight if I don’t use it up?”  If the answer is yes, then put that veggie on the counter.  Plan your meal around that vegetable.  Do the same for your dairy products.  After you complete this exercise, you should have the beginnings of a great lunch or dinner.  Maybe you’ll find goat cheese and broccoli, or sour cream and red peppers.  Take that combination and add it to the pantry items you found.  Eliminate anything that doesn’t fit from your new combo – for example, you really shouldn’t eat soy sauce, black-eyed peas, cabbage, and vanilla soymilk together.  Well, you can if you want to, but don’t invite me over to dinner to try it.

Preheat the oven / Heat olive oil in a pot

Finally, start cooking!  Preheat the oven if you’re making cookies or a casserole.  Heat some olive oil in a pot to sauté veggies.  By now, you should have a great combination of ingredients ready for your meal.  Throw everything together in a pot or dish, and enjoy!

Homemade “Clif” Energy Bars

I’ve tried to make homemade energy bars in the past, and the ingredients always crumble into pieces instead of staying together in a bar.  The crumbles are delicious, of course, but I need a snack that I can pack into my purse for some quick energy during the day.  My friend M. demonstrated her wonderful kitchen creativity the other day when she invented these homemade energy bars.  The results were so good; I wanted to eat the entire pan.  These bars are very rich and chewy, and are made without refined white sugar.  M. used up items in her pantry and saved some money on boxed energy bars in the process.  Win-win!

Ingredients:

½ cup cocoa powder

½ cup skim milk

One small can of low-fat evaporated milk

½ cup whole wheat flour

Two tablespoons honey (add more if you want a sweeter taste)

One egg

2 cups rolled oats

½ cup coconut flakes, toasted

½ cup chopped walnuts, toasted

1 tsp. baking powder

1 tsp. cinnamon

¼ tsp. salt

Directions:

Preheat your oven to 350 degrees.  Spray a 9 X 9 baking pan with non-stick spray and set aside.

Toast the coconut flakes and walnuts: put the coconuts and walnuts on a flat griddle on the stove, and turn the heat on medium.  Stir the coconuts and walnuts occasionally to prevent burning.  Turn off the burner when dark spots start to appear on the walnuts, and the coconut looks browned.  If you don’t have a griddle, you can also spread the coconut flakes and walnuts on a cookie sheet.  Put the cookie sheet in the preheated oven for 5-10 minutes.

Heat skim milk, cinnamon, and cocoa powder in a small saucepan.  Stir over medium heat for two minutes, and then add in the evaporated milk.  Keep stirring constantly for five minutes.  Turn heat off.

In a large bowl, combine the flour, honey, oats, baking powder, and salt.  Add the egg, and then stir to combine.  Stir in the toasted coconut flakes and walnut pieces.  Add the cocoa powder-milk mixture, and stir until combined.  Spread the batter into the prepared pan.  Bake at 350 degrees for 15-20 minutes.  Let cool, then slice into squares or triangles.

Enjoy!
~Semi-Veggie Jessie


Broccoli and Red Pepper Stir-Fry October 29, 2010

Filed under: Recipes — semiveggie @ 4:22 pm
Tags: , , , ,

Broccoli and Red Pepper Stir-Fry


I have a foolproof method to guarantee your success in the kitchen.  My method is easy and effective; once you start using it, your friends will be fighting for a seat at your kitchen table.  In addition, this method can help you avoid ordering take-out too often.  A few years ago, J. and I were on a first-name basis with our local Thai food delivery guy.  Our addiction to curry got so bad that our delivery guy got us a Christmas present one year for being his best customers.  Don’t be like us.


So how can you avoid take-out temptation?  Just use one of these three forbidden ingredients:


1.  A bottle


2.  A can


3.  A package


I know what you’re thinking.  A food blog is supposed to be about how to make food!  You didn’t come to SemiVeggie to learn about how to reheat a pre-packaged frozen burrito.  I’m pretty sure you know how to do that on your own.  And honestly, most days I love to make food from scratch.  I often make my own pizza dough and salad dressing, and I’ve even gone so far as to attempt making my own mayonnaise before.  Cooking from scratch is fun and rewarding, when I’m in the mood.  But why is there a weird bias in the food world against using pre-made items?  You’re viewed as virtuous when you make cookies from scratch, but seen as weak when you succumb to the tube of chocolate chip dough.  Yet both scenarios involve you standing in your kitchen, creating food for loved ones.  Yes, I know that prepackaged food is full of sodium and chemicals.  I realize that it’s healthier to make everything from scratch.  I can even promise you that it’s way more fun to make your own salsa rather than buying it.  But sometimes, a bottle can make the difference between cooking dinner and ordering greasy Chinese take-out.  I’m telling you right now that it’s ok to use “the forbidden three” in the kitchen every once in a while.


For example, last year I attempted to make lemon meringue-topped cupcakes for a friend’s birthday party.  I spent over an hour making the lemon curd filling from scratch, melting butter and stirring the creamy custard.  The lemony end result was incredibly delicious, and my kitchen smelled like summertime.  Yet by the time I had finished scrubbing out the crusty yellow glaze from the pot I realized I wasn’t having fun anymore.  I just couldn’t face the thought of whipping egg whites for meringue, and I was dreading creaming the butter for the cupcake batter.  I was sick of cooking, tired of standing, and was about ready to pour the lemon curd down the drain.  I was dangerously close to leaving the kitchen, cupcake-less.  Then, I spotted an old box of yellow cake mix in the back of my pantry.  I’m pretty sure it was full of hydrogenated fats and high fructose corn syrup, but it saved my cupcakes and my sanity.  I added lemon juice to the cake mix and poured the batter into a cupcake pan.  After cooling the cupcakes, I spread the pale yellow lemon curd on top instead of icing.  Success!  No one ever knew about my original meringue ambitions, and my friends were thrilled with the sugary treats.


Let’s say it together: “It’s ok to use forbidden ingredients”.  This recipe uses bottled stir fry sauce.  You can make your own sauce, if you want – throw some chopped ginger, soy sauce, water, cornstarch, honey, and garlic together and simmer.  Or, you can use some pre-packaged help. Sometimes, chopping veggies is all I can manage after a long day of explaining to fourth graders why it’s a bad idea to use violin bows to stage a swordfight.  So, on days like that, I chop my veggies, and I let the bottle do the rest.  Dinner is served in ten minutes, and it’s even faster than take-out.  Just make sure to tell your usual delivery guy that you won’t need his services tonight.


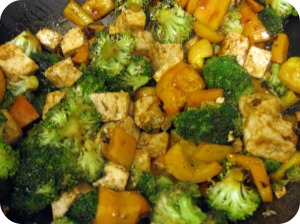
Broccoli and Red Pepper Stir-Fry


Ingredients:


Two tablespoons of olive oil

Two cloves of garlic, minced

One head of broccoli, chopped

Two red peppers, diced

One block of extra-firm tofu

Preparation: Take the tofu out of the package.  Place a heavy bowl on top of the tofu.  Let drain for twenty minutes.

8 oz. stir fry sauce

Optional additions: cashews, peanuts, or sesame seeds


Directions:


Heat two tablespoons of olive oil in a pot over medium heat.  Add minced garlic and cook for two minutes.  Add red peppers and broccoli.  Toss to combine ingredients.  Cook for five minutes, stirring to make sure the veggies don’t burn.


Meanwhile, cut drained tofu into cubes.  Heat up a dry skillet over medium heat.  Place tofu cubes on skillet and cook for one minute.  Flip the tofu cubes and cook another minute.  Continue to flip tofu until the cubes are browned all over.  Sprinkle tofu with salt and pepper.  Add the browned tofu to the veggies.  Pour stir fry sauce on top, and mix to combine.  Add nuts or sesame seeds, if you want to be fancy.


Enjoy!
~Semi-Veggie Jessie


Toasted Kale and Mushrooms with Gnocchi October 26, 2010

Filed under: Recipes — semiveggie @ 1:47 pm
Tags: , , , ,

Toasted Kale and Mushrooms with Gnocchi

Random fact about me: I need to learn absolutely everything about a subject before I can take action.  I’m not proud of my neurotic habits – I would give anything to be more spontaneous.  But it’s just not my style.  I’m the type of person who reads all 146 amazon.com reviews on the latest paperback book before buying.  I routinely google my medical concerns before I actually pick up my phone to call my doctor.  I can’t seem to publish a post on SemiVeggie without obsessively reading it a million times, checking for grammatical mistakes and making sure my writing is accessible to the beginning home cook.  I’m great at gathering information, but I’m awful at following through.  Many of my great ideas go into the trash bin because I cannot seem to get started.


Two years ago I knew I wanted to learn how to cook, and I tried to convince myself to take action.  Of course, instead of actually walking into the kitchen, I ended up reading a million food blogs and learning everything I could about cooking.  As a result of my efforts, I soon could talk for hours about the differences between summer squash and winter squash, but I had never actually tried to cut into a squash with a butcher knife.  I’m sure you can relate – cooking sure seems fun when you’re watching Paula Deen douse her cornbread in butter, but in reality it’s hard to peel yourself away from your TV long enough actually go preheat the oven.  Oh, I’m sure you’ve done your research, promising yourself you’d learn to cook – maybe you invested in expensive non-stick cookware, or watched multiple YouTube videos about how to dice a mango.  I did the same – I used to scour thrift stores for fun kitchen gadgets, but the flat spatulas and pastry brushes would sit unused in my kitchen drawers.  I’d tried to learn to cook before, but had only gotten as far as re-heating Easy Mac.  Two years later, I’ve gone from food blog reader to food blog writer, and I cook every chance I can get.  I get excited when Wegman’s has Hungarian paprika on sale, and I can tell you the best way to liven up a grilled cheese sandwich (add Balsamic vinegar, in case anyone was wondering).  What the hell happened to me?


Here’s the truth: I was finally inspired to put knife to veggie when I faced my first bitterly cold upstate New York winter.  I’m sure you can picture the scene: I’m wrapped up in blankets, with my laptop on my lap, going stir crazy in the middle of January.  Out of a fit of desperation, I posted a sad little message on Facebook:  “Anyone want to come over?  I’ll make dinner”.  To my surprise, my friends replied: “Sure!  We’ll be over in an hour.”  I gathered up my courage and started boiling water for pasta.  Soon, I had a house full of friends, wine, and laughter in the middle of winter.  And the best part was: I didn’t have to leave my house! I had figured out a way I could fill up my social calendar without venturing out into below-freezing temperatures.  Win-win!


I quickly fell in love with my new role as cook.  I discovered I loved hosting casual dinner parties, and my kitchen confidence grew with every veggie I diced.  My new hobby grew into an obsession, and I couldn’t be happier.  Oh sure, I still love to know everything before I actually cook – I will read through the recipe many times before starting, and I often make a recipe for my fiance before I will serve it to friends.  But I can tell you – actually cooking is way more fun than reading food blogs.  So get up out of your computer chair, put your laptop on your kitchen counter, and start cooking!  This gnocchi recipe is a favorite of J’s, and it’s perfect vegetarian comfort food for the cold winter months.  Make it, and invite your friends to join you.  Tell them to bring wine.


Toasted Kale and Mushrooms with Whole Wheat Gnocchi


Two years ago, I would have been intimidated by the ingredients in this recipe.  Please don’t be a wimp like I was.  Recipes should be flexible – if kale scares you, then substitute spinach or swiss chard or broccoli.  Kale is yummy and healthy and cheap – I highly recommend it.  I buy a large bouquet of the curly green stuff at Wegman’s every week, and I throw it into soups, pastas, and stir-frys.  You can find pre-made whole wheat gnocchi in the regular pasta aisle.


Ingredients:

Two tablespoons of olive oil

Two cloves of garlic, diced

Or one teaspoon of the pre-diced garlic

One bunch of kale

Preparation: Strip off the curly leaves, throw out the stems, and rip the leaves into small pieces.  Rinse pieces to remove any dirt.

One 16 oz. package of sliced mushrooms

I like to use prepackaged baby ‘bellas, but any kind will work.

¼ cup of Parmesan cheese

Salt and pepper to taste

Extra olive oil to drizzle on top


Directions:

You’ll need two pots for this recipe: one for the gnocchi, and one for the kale and mushrooms.  A wok works well for the veggies if you want.


Directions for gnocchi:  Bring four cups of water to a boil over high heat.  Drop the gnocchi into the boiling water.  Cook according to package directions (gnocchi are usually ready in 3-4 minutes).  Drain the water from the pot.


Directions for veggies:  Add the two tablespoons of olive oil to a pot over medium heat.  Wait until the oil is hot, and then add the garlic.  Let the garlic cook for a minute, then add the entire package of mushrooms.   Cook the garlic and mushrooms together for 5-10 minutes, until the mushrooms are dark and juicy.   Add the prepared kale to the pot.  Sprinkle salt over the kale, mushrooms, and garlic.  Stir the veggies around the pot to cook.  After about three minutes of cooking, the kale should turn bright green.  Keep stirring so the veggies don’t burn.  Cook for five more minutes, and then turn off the burner.


Combine cooked gnocchi with kale and mushrooms.  Add a generous drizzle of oil and the ¼ cup of parmesan cheese.  Add salt and pepper to taste.  Toss to combine.


Enjoy!

~Semi-Veggie Jessie


Grandma Sara’s Lentil Soup October 19, 2010

Filed under: Recipes,Tips — semiveggie @ 4:17 pm
Tags: , , , , , ,

Recipe: Grandma Sara’s Veggie Soup


Picture this: You’re standing in front of your fridge at dinnertime, staring at the contents. “Hmm, that celery is going limp”, you think. “I should use it up. Why did I even buy celery to begin with? What the hell do you actually make out of celery? I should have bought mushrooms instead – at least mushrooms can go into a salad. Celery is useless”. After staring at the leafy stalks for a minute, you suddenly realize that Glee has already started. Before you know it, you’re camped out in front of the TV with a bowl of cereal in your hands, happily munching Capt’n Crunch and singing along to the latest Beyonce-Josh Grobin mashup song. Now, I love cereal for dinner as much as anyone, but too many nights of sugar and carbs can really impact your energy levels. Plus, you spent good money on that celery, and it won’t take much effort to transform it from a limp stick into an amazing meal.

“But Jessie”, you whine. “Cooking takes time, and effort, and I don’t even like celery anyway”. How can you overcome your inertia and actually start cooking? You don’t need fancy equipment or tons of time, you simply need to go create something edible! Here are some action steps:

1. First, go into the kitchen.
2. Make yourself stay in the kitchen for twenty minutes.
3. During those twenty minutes, explore! Dig in the pantry and see what’s there. Did you buy curry powder on a whim and never use it? Have your dishes been piling up in your sink so high you haven’t been able to reach the water faucet? Open up the curry and wash your dishes.
4. After twenty minutes, give yourself permission to leave the kitchen if you want. Hopefully your kitchen is cleaner and more organized than when you first ventured in. Go through these four action steps once a day for a week, then come back to this list.
5. If you don’t want to leave the kitchen yet, or you’ve already spent a week introducing yourself to your kitchen, then the next step is to decide on one ingredient. Pick just one item you would like to eat. Today’s item: celery.
6. Google “celery + vegetarian + recipe”. Seriously, you’re already obviously an Internet user, so use the Internet to your advantage. I find tons of dinner inspiration by simply googling the contents of my pantry.
7. Go through the results until you find a recipe that includes ingredients you already have in your pantry.
8. Stay in the kitchen! I know it sounds obvious, but if you leave your kitchen you will not cook dinner. I bring my laptop into my kitchen so I can listen to Pandora while I cook.
9. Follow the recipe, and don’t leave your kitchen until dinner is finished! Get a stool for your kitchen so you can sit and surf the Internet while the oven is preheating.
10. Enjoy your dinner! Even if it your concoction tastes weird, you just learned more in twenty minutes than you would have by watching Glee.

This recipe was passed down to me from my fiance’s Grandma Sara. If you’ve never tried cooking celery, onions, and carrots together, you are in for a surprise. Your kitchen will smell incredible, and your friends will be in awe of your amazing culinary skills. In terms of dinners that can be eaten with a spoon, this soup is a million times better than Capt’n Crunch.

Grandma Sara’s Veggie Soup

Ingredients:

Two tablespoons of olive oil

Three stalks of celery, diced

Three carrots, peeled and diced

            I sometimes just cut up baby carrots

One small onion, diced

Two cloves of garlic, diced
            Or one teaspoon of the pre-diced garlic

Two small cans of tomato soup

One can of corn

Three cups of water or veggie broth

8 oz. lentils or chickpeas

Extra veggies, based on what you have in the fridge: mushrooms, diced tomatoes, or spinach

Salt and pepper to taste

Parmesan cheese to taste

Directions:

In a large stock pot, heat up the two tablespoons of olive oil over medium heat. Add the celery, onions, and carrots. Cook for five minutes, stirring occasionally. Add the garlic and cook one more minute. Add the water, tomato soup, corn, and lentils (or chickpeas) to the pot. If the soup is too thick, you can add more water. Add any extra veggies you want. Season with salt and pepper (I like lots of salt in this soup). Turn the heat down to medium-low, and cook for 30 minutes if using lentils. If you’re using chickpeas, your soup will be ready after cooking for 15 minutes. Ladle 1/2 of the soup into a blender, and blend it up. Add the blended soup back into the rest of the pot and stir. If you like your soup creamier, you can blend the entire pot of soup. Top with Parmesan cheese and serve!

Enjoy!
~Semi-Veggie Jessie


Whole Wheat Couscous Salad with Avocado and Raisins October 18, 2010

Filed under: Recipes — semiveggie @ 12:50 am
Tags: , , , , , , , , ,


Semi-veggie?  I know, it doesn’t seem fair.   You secretly wish I would declare allegiance to your side, whether you are a card-carrying PETA member or a regular at the Outback Steakhouse.  You want to force me to decide, already!  You think I’m completely tormented by my gastronomic limbo.  After all, my double-agent culinary agenda means dirty looks when I request the last vegetarian meal on an airplane, not to mention the quiet gasps around the dinner table when I take a bite out of a chicken leg.  “How can she live like that?”, you wonder.  Well, you can relax.  I’ve made peace with my semi-veggie eating habits, and I’m excited to share my daily dinners with you.  For example, this couscous salad is delicious, filling, and easy.   This unusual combination of ingredients will quickly become a favorite dish.  

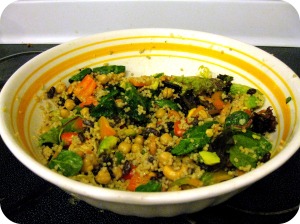
Whole Wheat Couscous Salad with Avocado and Raisins


Ingredients:

One ripe avocado, cubed

1/2 cup unsalted cashews

1/2 cup raisins

One 16 oz. can of chickpeas

Two red sweet peppers, diced

Large handful of fresh spinach

1/2 cup sharp cheddar cheese, shredded

1 cup whole wheat couscous, cooked and drained

Salt and pepper to taste

Directions:

In a large bowl, combine the first seven ingredients.  Pretty, isn’t it?  I love the colors in this salad.  Next, mix the drained couscous into the salad.  The warmth from the couscous will melt the shredded cheese nicely.  Add salt and pepper to taste.  

Enjoy!

~Semi-Veggie Jessie

//